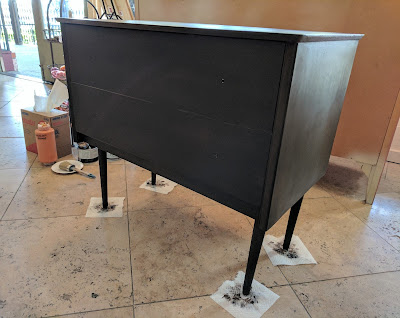
Hey! Cara here. I'm taking over Bobbi's blog, because I'm so excited to share the latest piece I've painted for the shop!
We've had this adorable two drawer mid-century dresser for a while now, and until recently, we've had it painted Antoinette with Clear Wax. While Antoinette is a great color and I absolutely love it as an accent, I thought this particular dresser needed a little something-something special. So, I decided (on my own-- shhh! Don't tell Bobbi!) that it was time to give this piece a face lift. One thing I love about Annie Sloan's amazing Chalk Paint® is that you can paint directly over the wax without any prep work, so I could just dive in and immediately start the creative process. Keep reading to learn my process and see the finished product!
I started with a liberally painted base coat of Honfleur, which is a warm chocolatey brown. Because I was aiming for a textured finish, I wasn't worried about which way my brush strokes went. Usually I am a smooth/modern painter, so I had to step back multiple times, take a deep breath, and convince my OCD to calm down. When I (finally) finished painting and stepped away long enough for the paint to dry, I sealed it with one coat of Black Wax to give the brush strokes some depth.
Next, I added random sections of Barcelona Orange, again painting liberally, and drying these spots with a hair dryer. As experienced painters will know, applying heat to the Chalk Paint® will allow it to crack naturally. Once this was dry, I took a damp sponge and distressed down to the Honfleur to give it a more natural look. We then sealed the Barcelona Orange with Dark Wax.
I used this same technique to add sections of English Yellow, sealing those spots with Dark Wax, too. This was my stopping point for Day 1, and I was FREAKING OUT. I sent a picture to my boyfriend for a little encouragement, and he replied that this is what Ron Weasley from Harry Potter would look like if he were a dresser. Not. Helpful.
Day 2. Now the fun part! I mixed Olive with sawdust to give it some nice texture and applied two liberal coats, using a hair dryer to dry each coat and give it some natural cracks. Once I was happy with the coverage, I used a medium grit sandpaper to cut through some of the sawdust, followed with a fine grit sanding block to add more smoothness. Afterwards, I took a damp sponge to gently distress through the Olive, revealing the English Yellow, Barcelona Orange, and Honfleur. It took a little playing around to find the right amount of distressing. I learned through trial and error (and repainting!) that the trick is not to force it, but to just let the paint distress where it wants to!
Honestly, the photos don't do it justice. Talk about a total transformation. Stop by the shop to check it out before it's gone! Tell us what you think in the comments below. And if you create something inspired by these techniques, we'd love to see the results! Don't forget to take before pictures!


